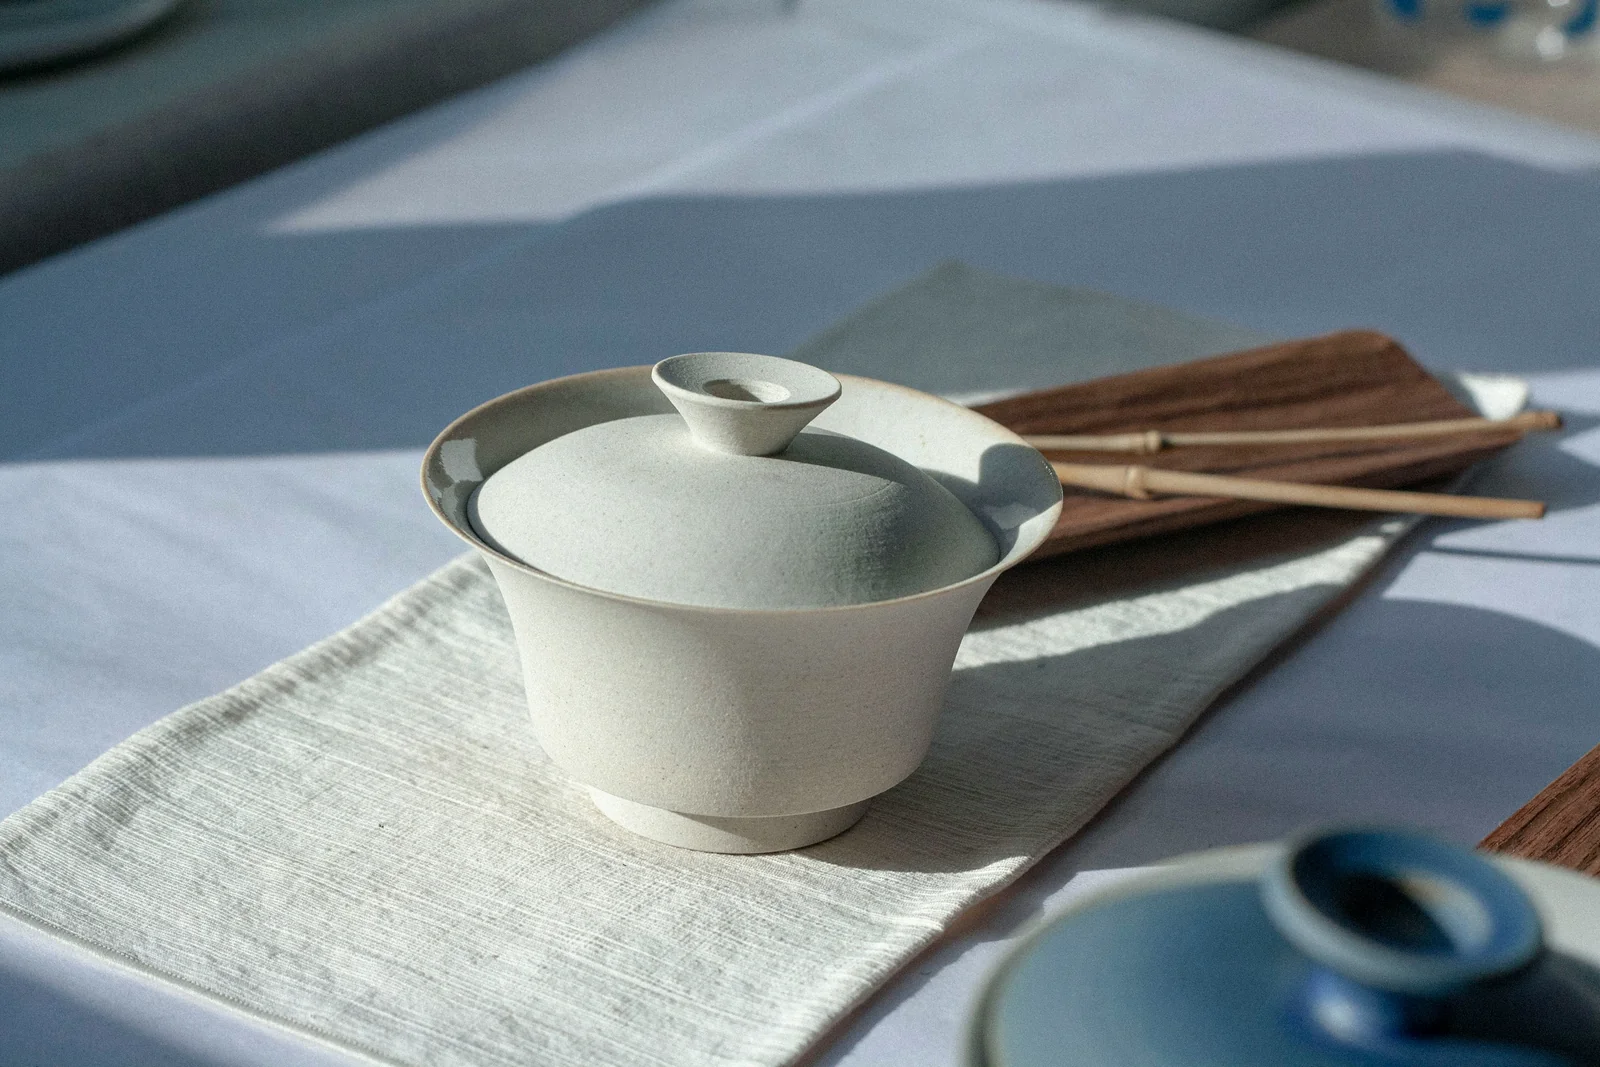
The short answer: for most first-time buyers, choose a glazed porcelain gaiwan with a measured working capacity near 90-120 ml, a clearly flared rim, a lid knob tall enough to stay away from the hot lid, a lid that moves without binding, and a stable foot. A beautiful pattern cannot compensate for a bowl that is too wide for your hand or too slow to empty.
That is the conclusion of this guide. The rest shows how to verify it with a scale, your own hand and a cool-water pour. It also explains when a different gaiwan shape, a pot or a glass is the better tool.
This page owns the hand-and-vessel decision. Use the tea-vessels collection when you still need to decide whether a gaiwan, handled pot, travel set or cups should solve the job.
What a gaiwan actually has to do
A gaiwan is a Chinese lidded bowl, usually made as three pieces: bowl, lid and saucer. The bowl holds leaf and water. The lid controls the opening and helps retain leaves while pouring. The saucer stabilizes the set and can support handling, but it does not make hot porcelain cool.
A useful gaiwan has to pass four practical tests:
- Fit: your fingers can reach stable contact points without stretching.
- Heat separation: the rim and lid knob keep the hand away from the hottest water-filled surfaces.
- Flow: the lid can make a controlled gap and the bowl empties without dribbling down its wall.
- Repeatability: you can measure the water, decant it fully and reproduce the result.
This is why gaiwan size is not only a number on a product listing. Capacity, rim diameter, wall angle, lid fit and your hand size work together.
The tested buying recommendation
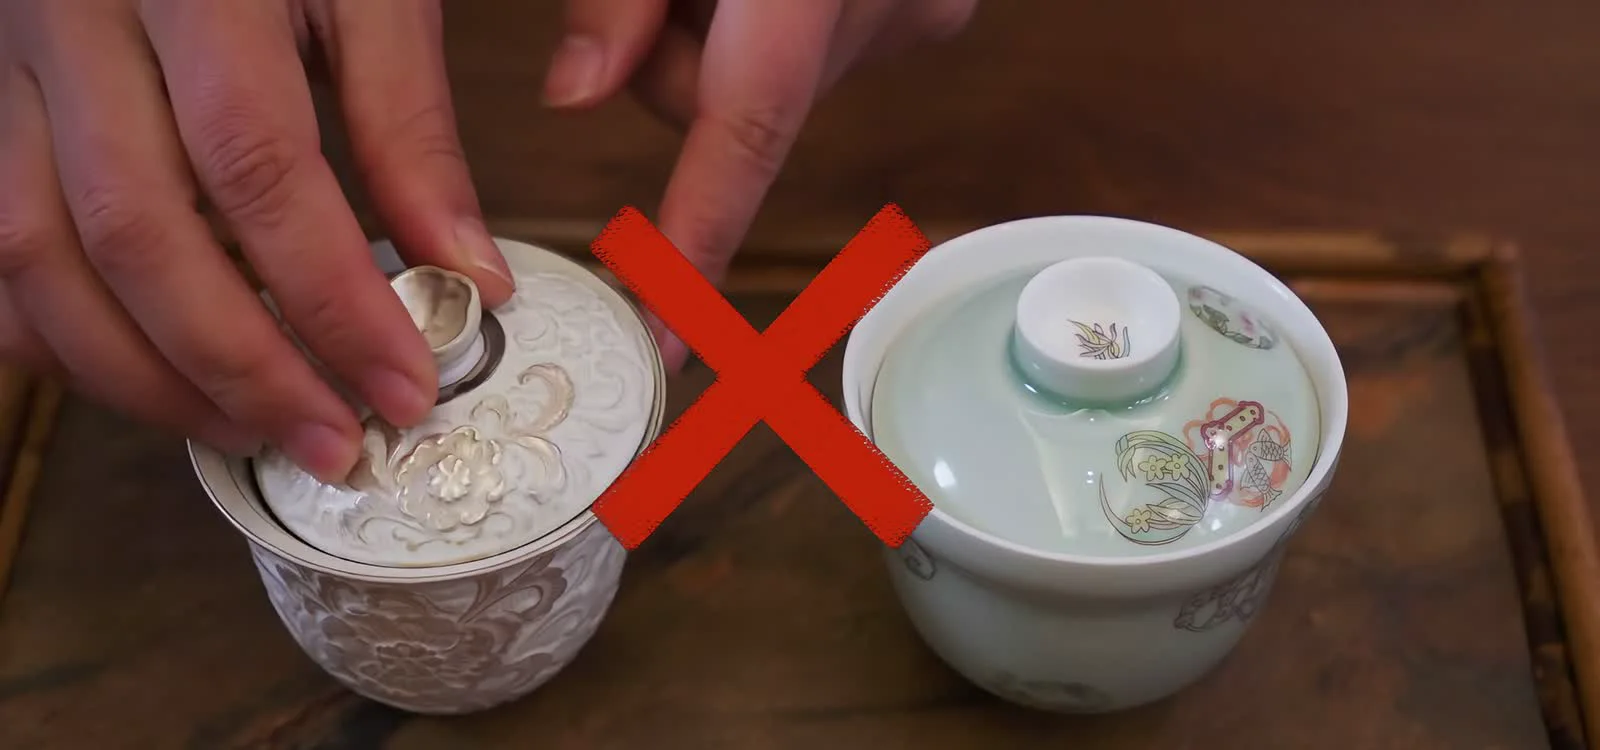
The vessels below look broadly similar in a shop category, but their lid knobs, wall angles, foot shapes and usable volumes are different.

For a first all-purpose gaiwan, use this specification as a filter rather than a rigid standard:
| Feature | Practical first choice | Why it matters and what to avoid |
|---|---|---|
| Working capacity | About 90-120 ml | Supports fast comparison brewing. Avoid listings that give only “small,” “medium” or brim capacity. |
| Material | Smooth glazed porcelain | Easy to clean; a pale interior exposes liquor and leaf. Avoid rough, dark interiors while learning. |
| Rim | Clearly flared outward | Creates finger clearance from the hot wall. Test tall, straight walls carefully. |
| Lid knob | Raised, stable and comfortable | Keeps the fingertip off the hot lid. Avoid low, broad knobs that force contact with the lid surface. |
| Lid fit | Free-moving with a controllable gap | Lets you set flow. Avoid binding, severe rocking or a gap that cannot be narrowed. |
| Foot and saucer | Stable on a flat table | Reduces wobble during filling and reset. Decoration should not compromise stability. |
| Overall span | Comfortable for your hand | Prevents strain. Reject a bowl you can span only by flattening the hand. |
The range is deliberately broader than one “perfect” number. A person brewing alone may prefer about 80-90 ml. Someone with a larger hand, or serving two small cups, may prefer 110-120 ml. The right test is not whether the product is fashionable; it is whether you can empty the intended water volume cleanly.
Measured capacity: two real samples
Product pages often blur three different numbers:
- Brim capacity is the water held when the bowl is filled to the top. It is easy to advertise and usually unsafe to pour.
- Lidded capacity is measured with the lid in place or to the lid's normal seat. Sellers do not use this term consistently.
- Working capacity is the water you can fill, grip and completely decant while leaving a dry band below the rim. This is the number that matters in use.
In an authorized real-vessel comparison, a white porcelain sample held 111.3 g of water on a tared digital scale. A smaller sample held 79.4 g. At ordinary room temperature, one gram of water is close enough to one milliliter for this household test, so the readings are approximately 111 ml and 79 ml. They describe these two samples only; they are not an industry standard.
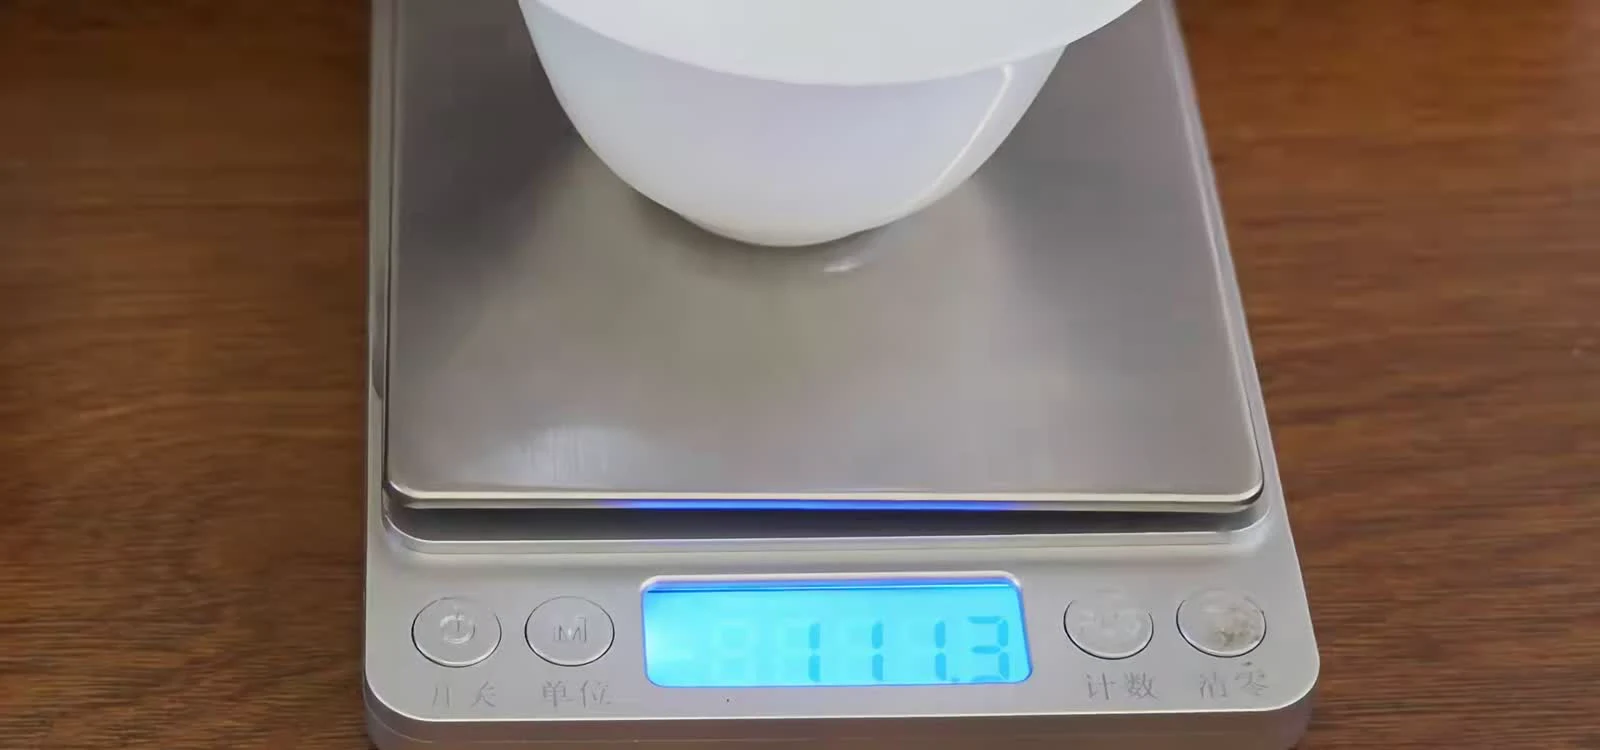
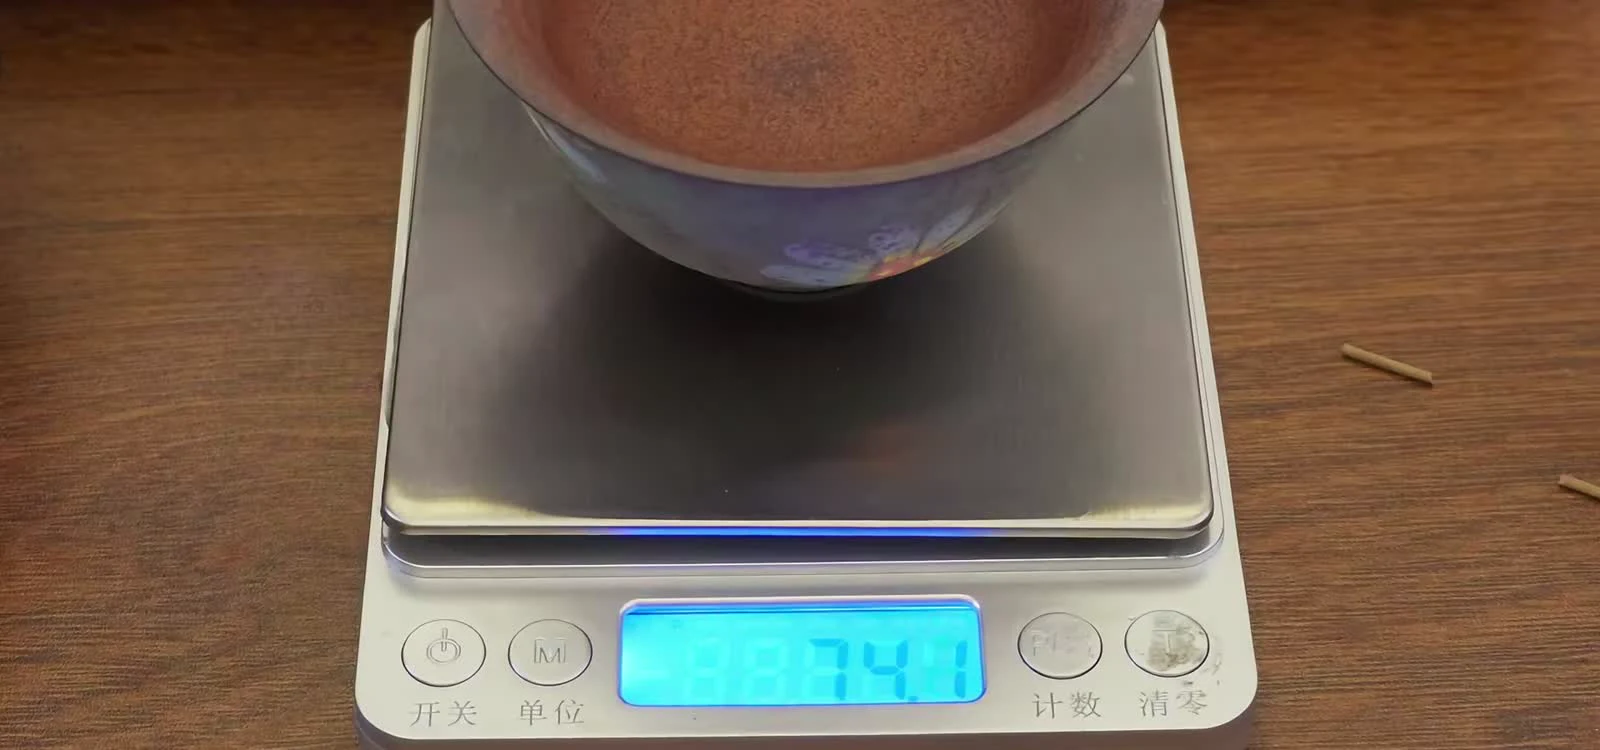
Measure your own gaiwan in three minutes
- Put the empty, dry bowl on a digital scale and press tare.
- Add cool water to the level you would actually brew with, leaving a dry band below the rim.
- Record the grams as the approximate working milliliters.
- Pour into your pitcher using the grip you intend to use.
- Weigh any water left in the bowl. More than a few grams left repeatedly means the pour or vessel fit needs work.
For a second measurement, fill to the brim and record the result as full capacity. Label the two numbers clearly. If a listing says 120 ml but your safe working fill is 95 ml, use 95 ml when calculating leaf-to-water ratios.
Shape matters more than decoration
Lid knob: height is not enough
The knob must give the fingertip a cool, stable contact area. A raised knob usually creates more distance from the hot lid. A hollow underside can also reduce the hot ceramic mass at the contact point, though material, wall thickness and preheating still change how fast it warms.
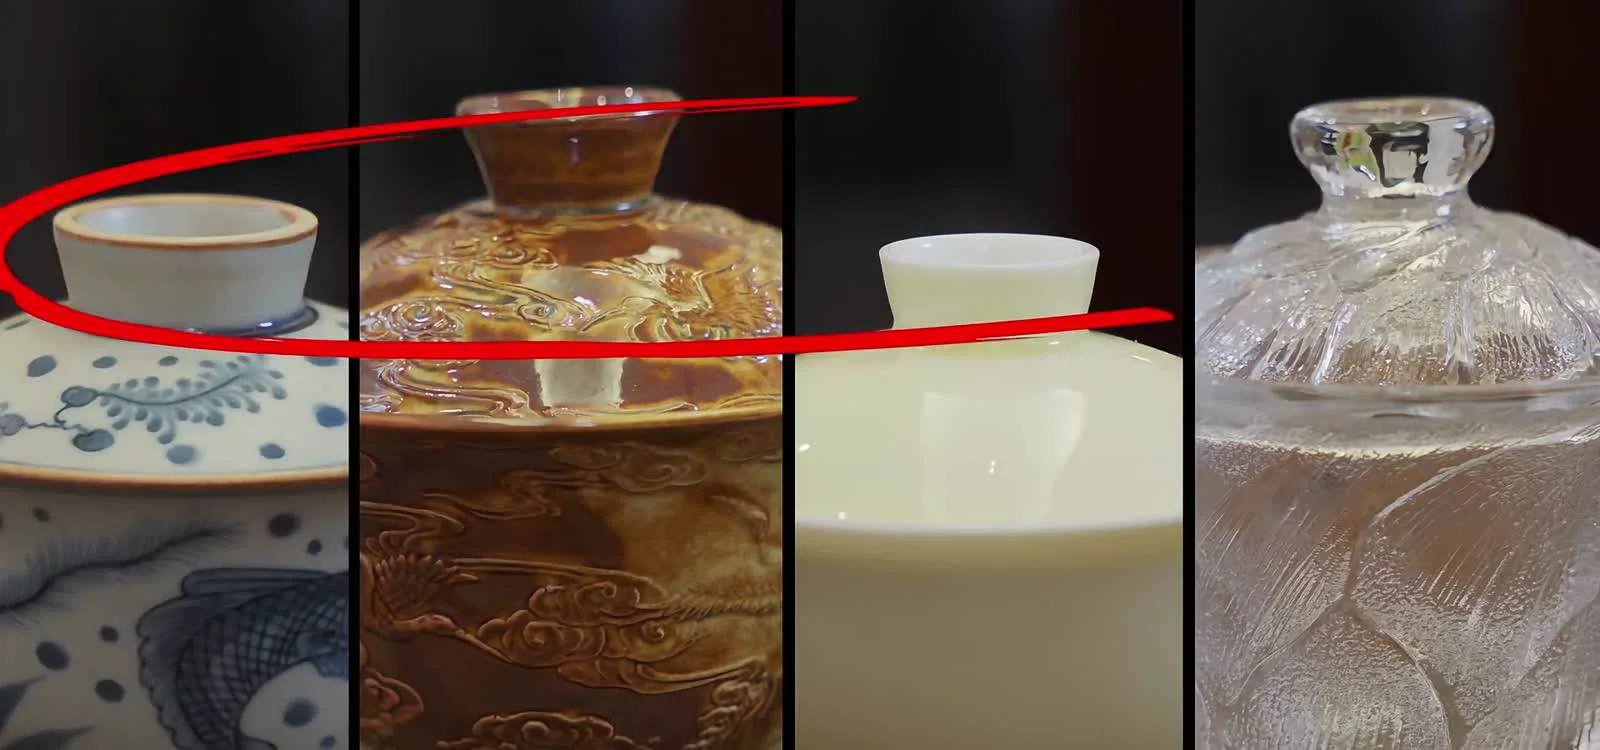
Test it with the lid dry. Place the pad of your index finger on the knob, tilt the lid slightly and return it to center. If the finger slides onto the lid or has to press hard to maintain control, the knob is a poor match for that grip.
Rim: flare creates working clearance
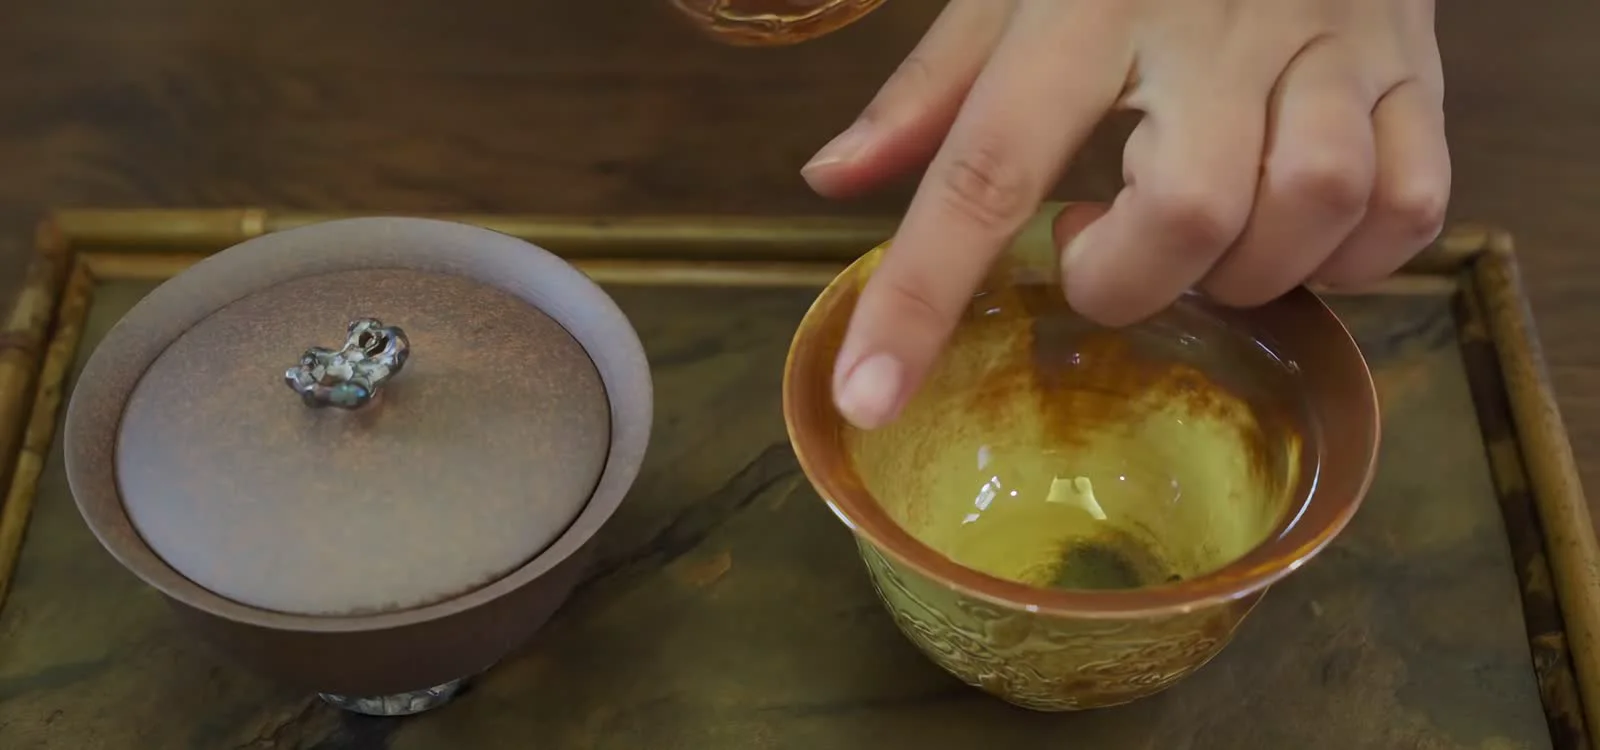
A flared rim increases the distance between the hot water-filled wall and the fingers. It does not make the bowl burn-proof: overfilling can heat the flare, and a slow pour keeps the hand near steam longer. But for a beginner using the common three-finger grip, visible flare is usually more forgiving than a tall straight wall.
Lid fit: controlled movement, not a sealed lock
The lid needs enough movement to open a narrow pouring gap. Too tight and it binds; too loose and it can shift suddenly. Rotate it dry, then repeat with cool water. Watch whether the stream starts cleanly, whether water tracks down the outside wall and whether the lid catches on one point.
Thin and thick walls solve different problems
Thin porcelain changes temperature quickly and usually feels lighter, but the wall can transfer heat to the hand quickly too. Thick porcelain has more mass: it may feel slower to heat at first, then remain hot longer. Neither is automatically superior. For a first gaiwan, prioritize comfortable geometry and a predictable pour before chasing extreme thinness.
A five-minute shop test
Use this test before buying in person. If shopping online, ask for a top view, side view, stated rim diameter and a real capacity measurement.
- Check the span. Put thumb and middle finger on opposite sides of the rim. Your hand should remain curved, not flattened or strained.
- Turn the lid. It should travel smoothly without grinding or locking at one point.
- Set a narrow gap. Confirm that the gap stays where you place it while the bowl is tilted.
- Test the knob. The fingertip should control it without touching the broad lid surface.
- Rock the set gently. The bowl and saucer should return to a stable rest.
- Pour cool water. Look for a coherent stream, complete drainage and no persistent flow down the outside wall.
- Repeat twice. A single lucky pour is not evidence of a good fit.
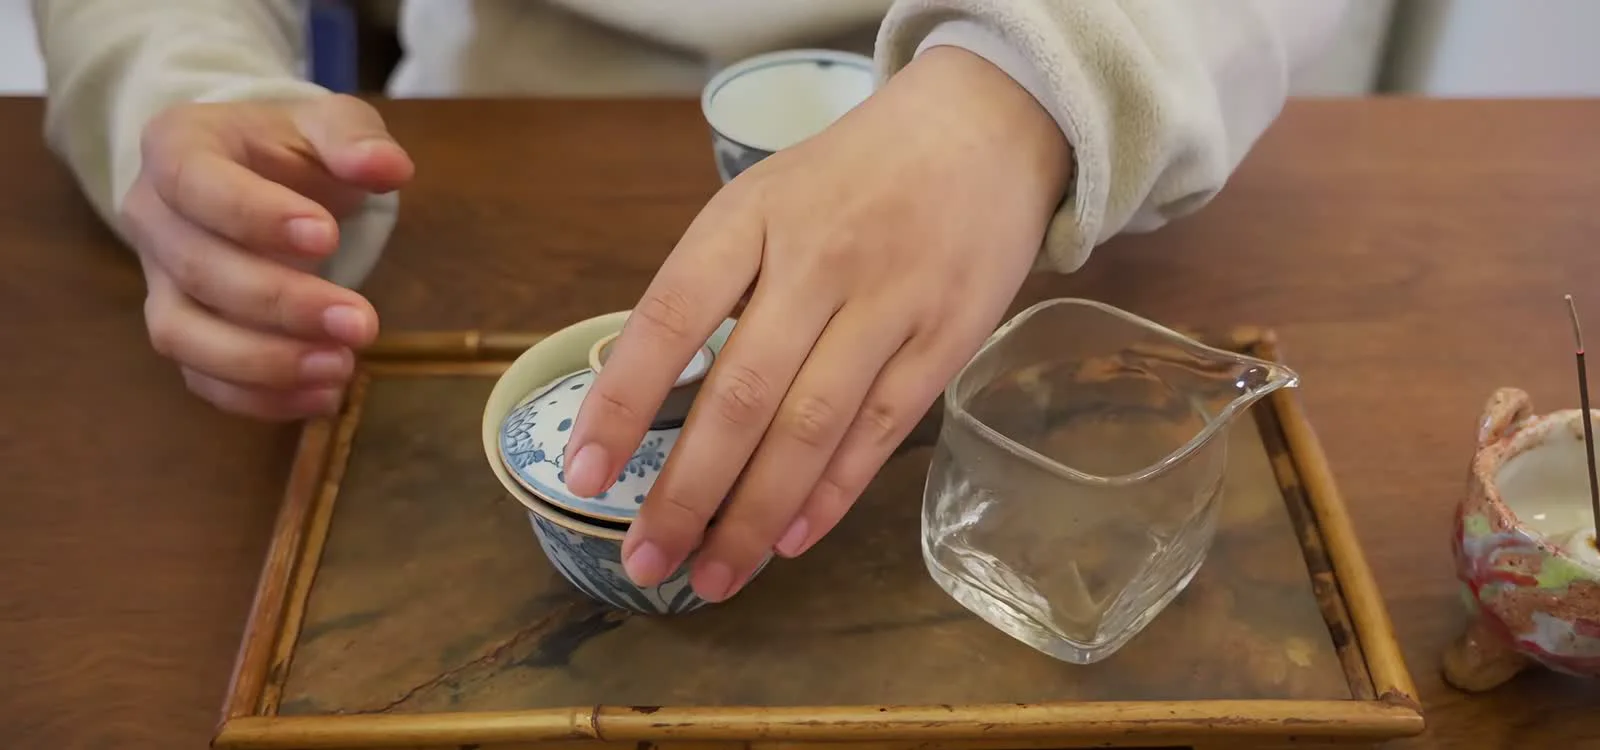
Reject the gaiwan if you already have to grip harder with cool water. Heat will not improve the ergonomics.
How to use a gaiwan: the complete operation
Learn with cool water first. The goal is one continuous, relaxed action, not a stylized hand pose.
1. Set the water volume before the tea
Measure the working capacity once. During practice, fill to that same level and keep a dry band below the rim. If water reaches the finger contact area before pouring starts, you have overfilled the bowl.
2. Add leaf by weight
Use a scale while learning. Rolled oolong, compressed tea and fluffy white tea occupy very different volumes, so teaspoons and visual fractions of the bowl are unreliable. Start with the table later in this guide and change one variable at a time.
3. Place the lid and set the gap
Seat the lid, then slide it a few millimeters toward the pouring side. Fine broken leaf needs a narrower gap; large intact leaf can tolerate a wider one. The gap is a filter and a flow control, not a decorative angle.
4. Establish three opposed contact points
For a flared gaiwan, place thumb and middle finger on opposite sides of the rim. Rest the index finger on the lid knob. The two side fingers support the bowl; the index finger controls the lid. Do not pinch the whole vessel with the index finger.
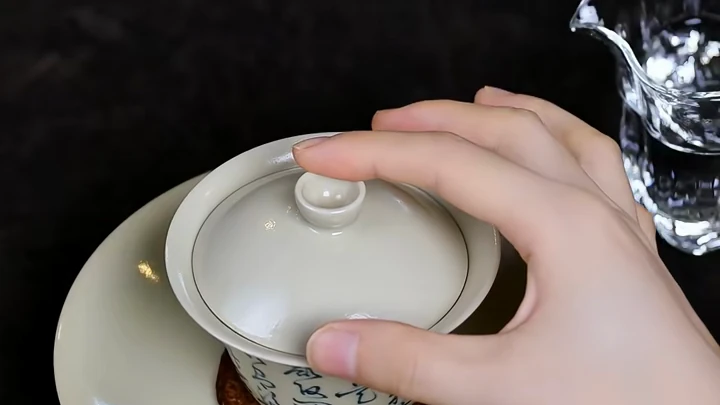
The exact clock positions depend on hand and pouring direction. In the reviewed demonstration, the useful contact line is roughly opposite across the bowl, near 6 and 12 o'clock. Opposition matters more than memorizing the numbers.
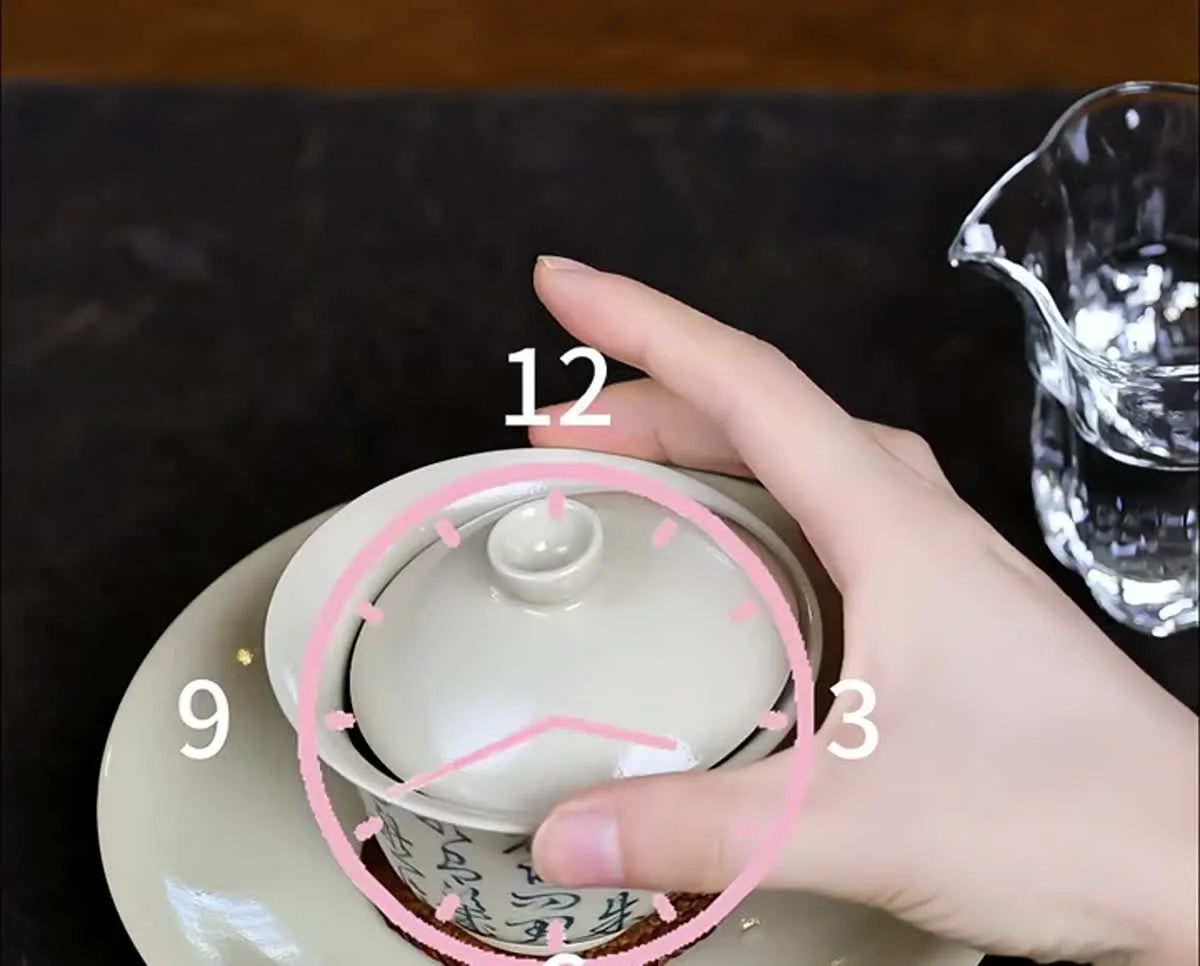
5. Aim the gap before lifting
Point the widest part of the lid gap toward the fairness pitcher or cup. Lift only after the receiving vessel is in position. This prevents a last-second wrist correction while holding hot water.
6. Pour from the wrist and empty completely
Keep shoulders and elbow loose. Tilt from the wrist in one committed motion; do not hover halfway while steam heats the fingers. Let the stream finish, return the bowl upright and set it down. Do not shake the last drops out: shaking destabilizes the lid and makes the timing less repeatable.
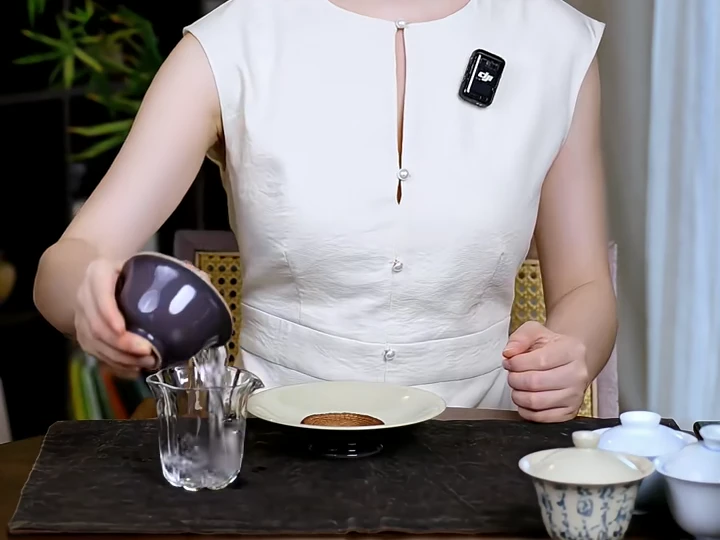
7. Reset before tasting
Move the lid slightly so the leaf is not trapped under a sealed hot lid. Check whether liquor remains at the bottom. Taste only after the vessel is stable. For the next infusion, change time before changing leaf, water volume and temperature together.
A different grip for a straight, tall gaiwan
The common rim grip is not universal. A taller straight-wall gaiwan may provide too little flare for safe side contact. In the reviewed demonstration, the alternative is a supported method: one hand controls the lid knob while the other supports the foot or lower body, keeping fingers away from the hot upper wall. If the vessel is still awkward with cool water, it is the wrong training tool for that hand.
Why your gaiwan burns, drips or clogs
| Symptom | Likely cause | Test and correction |
|---|---|---|
| Fingers burn at the rim | Overfill, narrow flare or hesitation | Repeat with half a bowl of cool water. Lower the normal fill or choose a more flared, smaller-span vessel. |
| Index finger burns | Low knob, preheated knob or contact with the lid | Hold the dry lid at pouring angle for ten seconds. Use the finger pad on a higher knob. |
| Water runs down the bowl | Gap aimed sideways, hesitant tilt or poor lid fit | Pour cool water over a dry tray. Aim first, accelerate smoothly and reject a persistently poor fit. |
| Pour is slow | Narrow gap, blocked exit or restrictive geometry | Repeat with water only. Widen the gap, reduce leaf crowding or compare another lid fit. |
| Leaves enter the pitcher | Gap too wide for that leaf grade | Narrow the gap. Add a small strainer only when broken leaf makes it useful. |
| Lid slides | Contact points are not opposed or the index finger pushes forward | Practice empty. Re-establish three balanced contacts and reduce force. |
| Wrist or shoulder tightens | Bowl is too wide, heavy or far from the pitcher | Move the pitcher closer and halve the water. If tension remains, reduce vessel diameter. |
| Tea turns bitter despite correct timing | Incomplete drainage | Weigh the liquor left after pouring. Drain fully before reducing leaf. |
Heat is not a test of seriousness. If the vessel repeatedly burns you after the fill and motion are corrected, change the vessel.
Starting recipes that reveal technique
These are controlled starting tests for a measured 100 ml of working water, not fixed rules for every tea. Use good-tasting water, weigh the leaf and fully decant each infusion. Adjust for leaf size, roast, compression, age and your preference.
| Tea and leaf per 100 ml | Water and first infusion | What to change first |
|---|---|---|
| Tender Chinese green tea, 3 g | 75-85°C; 45-60 seconds | Lower temperature if sharp; a glass may be easier than a gaiwan. |
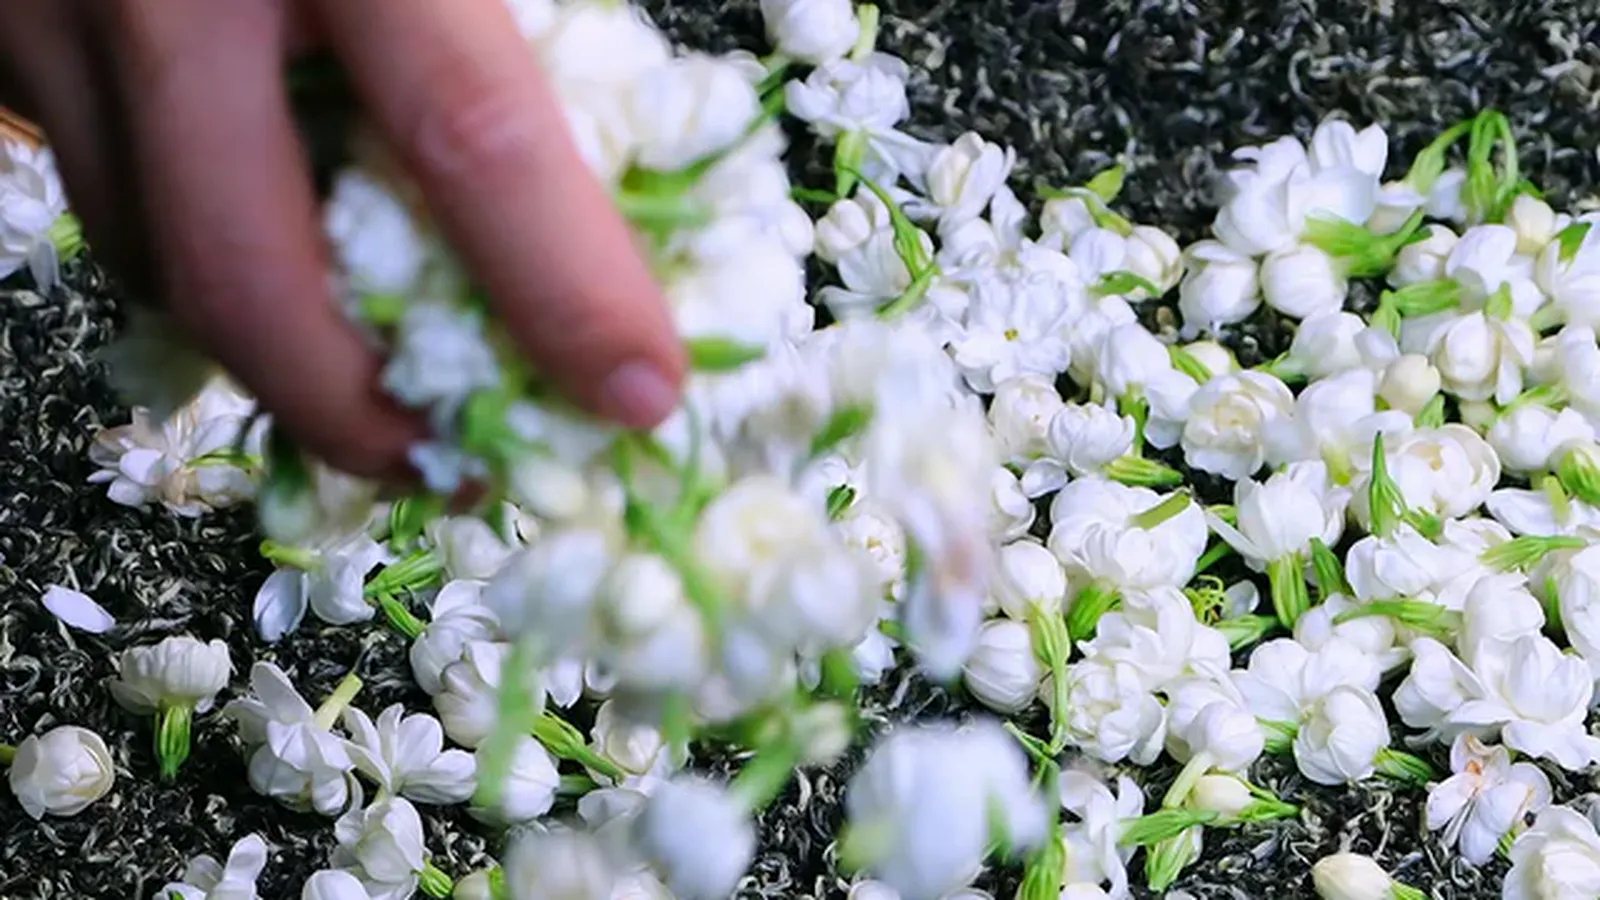
| Jasmine tea, 3 g | 80-85°C; 30-45 seconds | Shorten time if bitterness buries the scent. |
| White tea, 4-5 g | 85-95°C; 15-25 seconds | Increase time gradually if thin. |
| Light or rolled oolong, 6-7 g | 90-100°C; 10-15 seconds | Shorten the whole pour cycle before reducing leaf. |
| Roasted or twisted oolong, 5-7 g | 95-100°C; 8-15 seconds | Extend later infusions gradually. |
| Chinese black tea, 4-5 g | 90-95°C; 10-20 seconds | Reduce time for small or broken leaf. |
| Pu-erh or other dark tea, 5-7 g | 95-100°C; 8-15 seconds after any justified rinse | Separate storage aroma from extraction; extend later brews. |
If your gaiwan holds 80 ml, multiply the leaf figure by 0.8. If it holds 120 ml, multiply by 1.2. This simple correction is more useful than copying a recipe made for an unknown bowl.
For a focused oolong protocol, continue to how to brew oolong tea. For the broader variables of water, ratio and extraction, use our Chinese tea brewing guide.
Gaiwan, pot or glass?
| Choose | When it is the better tool | Main trade-off |
|---|---|---|
| Gaiwan | You want to inspect leaf, smell the lid and compare several short infusions | Requires fit, heat and decanting control |
| Small glazed teapot | You serve repeatedly and prefer a handle | Leaf is less visible; spout speed varies |
| Clay teapot | You already know the tea and want to explore how one pot behaves over time | Material and maintenance add variables; poor first comparison tool |
| Heatproof glass | You brew tender green tea or want to watch leaf opening | Extraction continues unless leaf and liquor are separated |
| Mug with infuser | You want dependable everyday tea with minimal handling | Less suited to rapid repeated infusions |
You do not need a gaiwan to respect Chinese tea. Use one when its open form and fast decanting answer a real brewing question. The broader Chinese tea set guide explains how pitchers, cups, trays and strainers fit around it.
The final buying checklist
Before paying, answer all six questions:
- Do I know the working capacity, not only the advertised maximum?
- Can my thumb and middle finger meet opposite sides without strain?
- Does the rim flare keep those fingers away from the hot wall?
- Can I control the lid by the knob without touching the lid surface?
- Does cool water leave in a clean stream without persistent dribbling?
- Can I perform three complete pours in a row while keeping my shoulder relaxed?
If any answer is no, keep looking. The right first gaiwan is not the most elaborate one. It is the one that lets you measure, pour and learn without fighting the object.
The UNESCO record for traditional tea processing techniques and associated social practices in China supports the broader context that Chinese tea knowledge is diverse and transmitted through living practice. It does not prescribe one universal gaiwan grip or establish a single origin story. That is why this guide refuses the popular “heaven, earth and humanity” explanation as proven history and tests the vessel through the hand instead.